C#如何创建与部署Windows服务的方式
|
 2024年6月7日 10:0
本文热度 756
|
前言
Windows 服务是运行在后台的应用程序,可以设置其在系统启动时自动运行,并在系统运行期间持续运行。这种应用程序没有用户界面,也不产生可视输出。通过服务控制管理器进行终止、暂停、启动的管理。本文将介绍派生自ServiceBase类的方式创建与部署Windows服务内容。
ServiceBase类
ServiceBase类是服务应用程序定义服务类时将继承自此类。使用【Windows服务(.NET Framework)】项目模板创建服务应用程序,就会创建继承自此ServiceBase类的Service1类。实现的任何服务都必须重写 OnStart 与 OnStop二个方法,可以重写OnPause和OnContinue二个方法。
1、创建服务应用项目
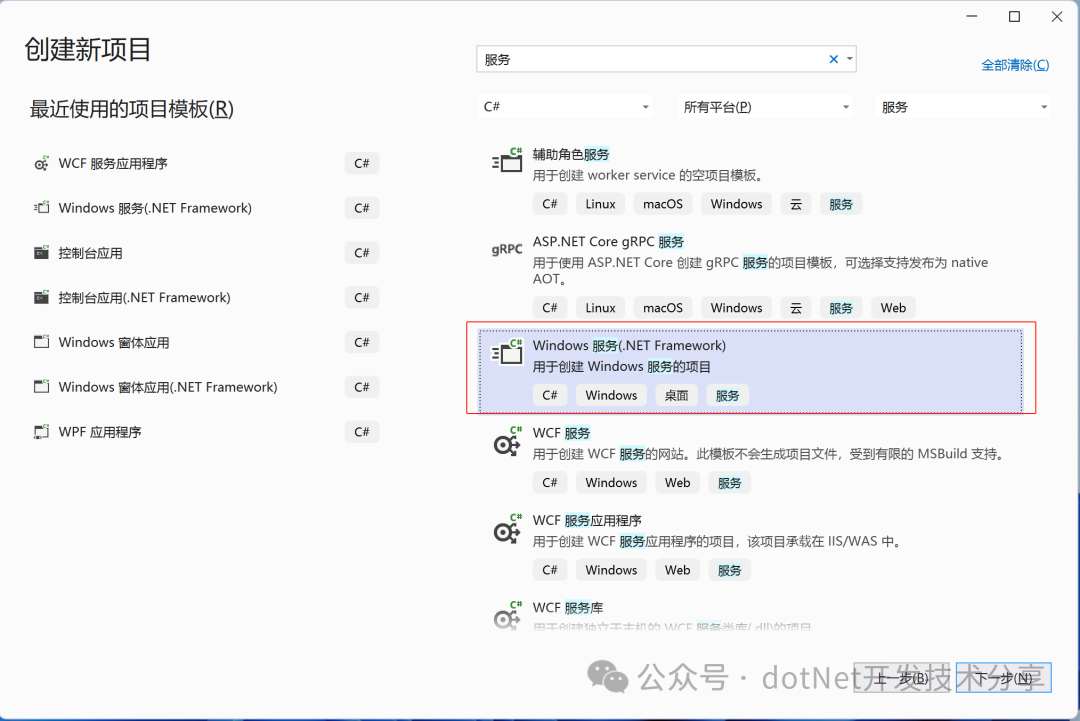
创建新项目----》选择【Windows 服务(.NET Framework) 】
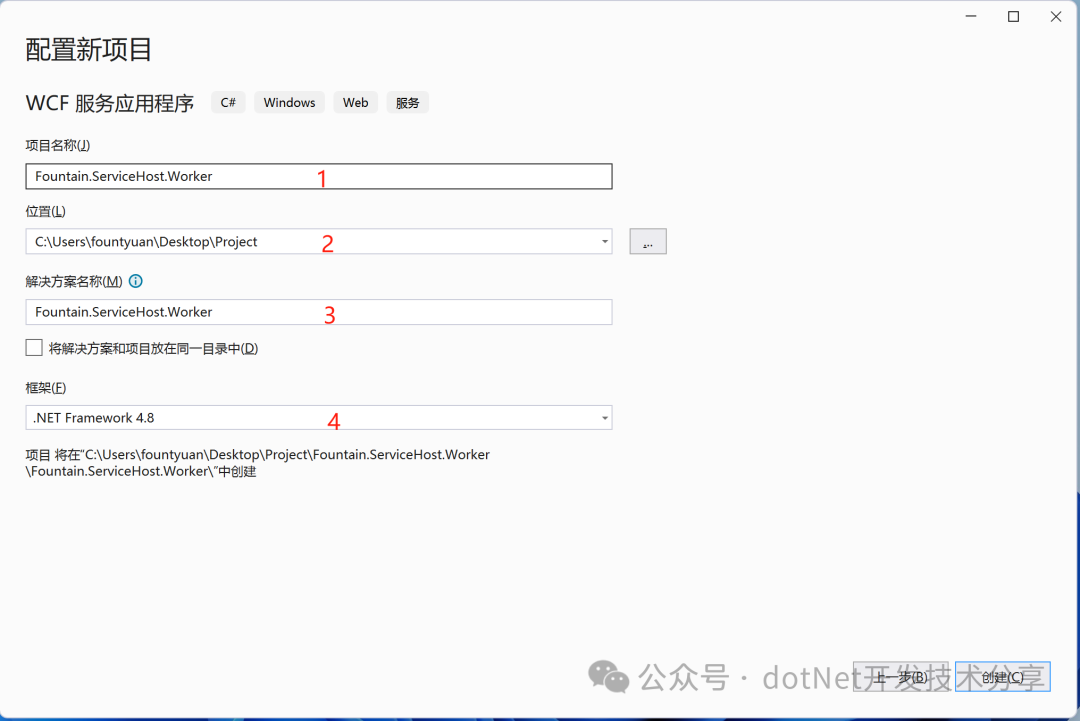
配置新项目的项目名称、存储目录和选择使用的目标框架。示例使用【Fountain.ServiceHost.Worker】为项目名称和解决方案名称。
项目创建成功后,我们会看到创建了Service1和Program二个类。可以根据实际需要对Service1类进行重命名。using System.ServiceProcess;namespace Fountain.ServiceHost.AutoWorker{ internal static class Program { /// <summary> /// 应用程序的主入口点。 /// </summary> static void Main() { ServiceBase[] ServicesToRun; ServicesToRun = new ServiceBase[] { new ServiceLog() }; ServiceBase.Run(ServicesToRun); } }}
服务类代码:在服务类的OnStart和OnStop方法,根据实际业务编写代码。using System;using System.Collections.Generic;using System.IO;using System.ServiceProcess;using System.Threading;
namespace Fountain.ServiceHost.AutoWorker{ public partial class ServiceLog : ServiceBase { // 删除日志计时器 private System.Threading.Timer deleteTimer; /// <summary> /// 构造方法 /// </summary> public ServiceLog() { InitializeComponent(); } /// <summary> /// 服务启动:服务运行时需采取的操作。 /// </summary> /// <param name="args"></param> protected override void OnStart(string[] args) { TimerCallback deleteTimerCallback = new TimerCallback(Delete); // this.deleteTimer = new System.Threading.Timer(deleteTimerCallback, 30, 5000, 60000); } /// <summary> /// 服务停止:服务停止运行时需采取的操作。 /// </summary> protected override void OnStop() { this.deleteTimer?.Dispose(); } /// <summary> /// 删除日志文件 /// </summary> /// <param name="retentionDays">保留几天的日志文件</param> public void Delete(object retentionDays) { try { List<string> retentionFiles = new List<string>(); //文件数组 string[] keepfile = new string[Convert.ToInt32(retentionDays)]; for (int i = 0; i < Convert.ToInt32(retentionDays); i++) { retentionFiles.Add(string.Format("{0:yyyyMMdd}", DateTime.Now.AddDays(-(i)))); } DirectoryInfo directoryInfo= new DirectoryInfo($"{AppDomain.CurrentDomain.BaseDirectory}{Path.DirectorySeparatorChar}log"); //目录是否存在 if (directoryInfo.Exists) { foreach (FileInfo fileInfo in directoryInfo.GetFiles()) { if (retentionFiles.Contains(fileInfo.Name)) { continue; } fileInfo.Delete(); } } } catch { } } }}
2、部署服务应用项目
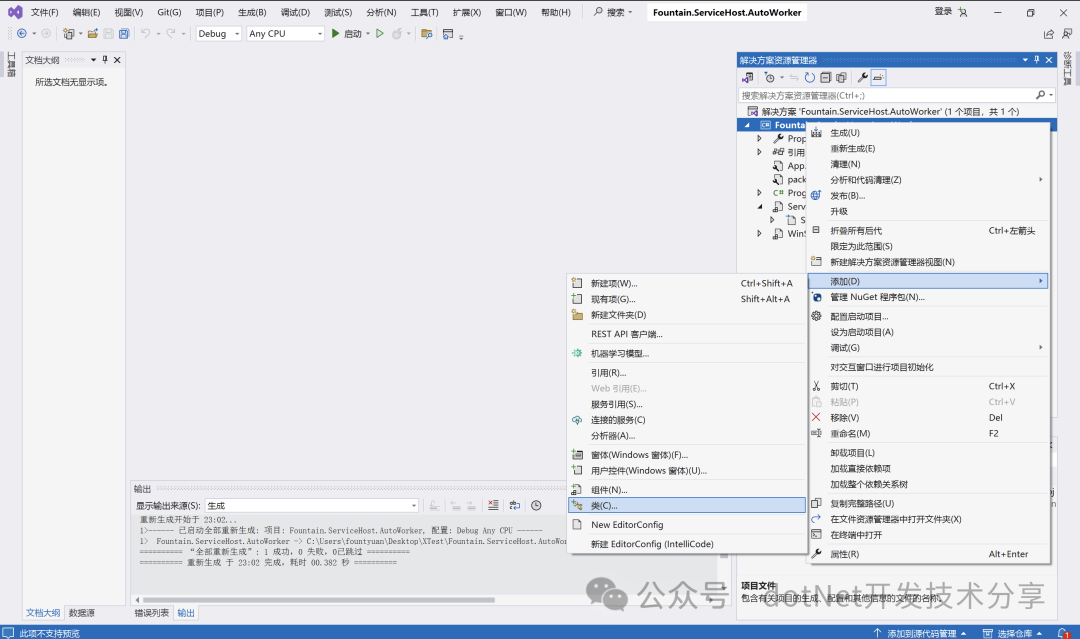
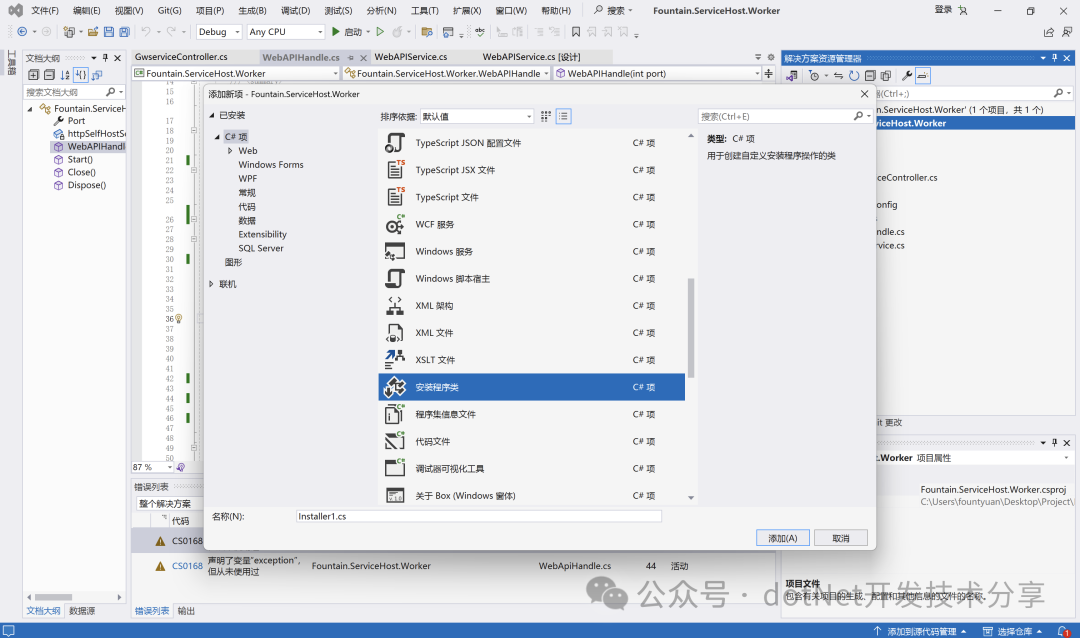
选择安装程序类----》点击添加。创建安装程序成功,并自动生成继承自Installer类的类。示例将安装类命名为【WinServiceInstaller】
安装服务类代码:服务组件中的服务名称、服务描述等基本信息。using System;using System.ComponentModel;using System.ServiceProcess;namespace Fountain.ServiceHost.Worker{ [RunInstaller(true)] public partial class WinServiceInstaller : System.Configuration.Install.Installer { private readonly ServiceProcessInstaller serviceProcessInstaller; private readonly ServiceInstaller serviceInstaller; public WinServiceInstaller() { try { string windowsServiceName = "ClearLogFile"; string windowsServiceDescription = "清理日志历史文件"; serviceProcessInstaller = new ServiceProcessInstaller { //账户类型 Account = ServiceAccount.LocalSystem }; serviceInstaller = new ServiceInstaller { StartType = ServiceStartMode.Automatic, //服务名称 ServiceName = windowsServiceName, //服务描述 Description = windowsServiceDescription }; base.Installers.Add(serviceProcessInstaller); base.Installers.Add(serviceInstaller); } catch (Exception objException) { throw new Exception(objException.Message); } } }}
编译项目程序,部署到Windows服务:使用installutil.exe。#region 示例安装部署// 以管理员身份运行cmd命令,把目录定位到InstallUtil.exe 所在的目录// 安装服务InstallUtil C:\Project\WinService\WebWorker.exe// 卸载服务InstallUtil /u C:\Project\WinService\WebWorker.exe#endregion
using System;using System.Configuration.Install;using System.ServiceProcess;using System.Windows.Forms;
namespace Fountain.ServiceHost.Main{    public partial class FormMain : Form    {        /// <summary>        /// 构造方法        /// </summary>        public FormMain()        {            InitializeComponent();        }        /// <summary>        /// 安装服务        /// </summary>        /// <param name="sender"></param>        /// <param name="e"></param>        private void buttonInstall_Click(object sender, EventArgs e)        {            try            {                if (this.GetService(this.textBoxServiceName.Text) == null)                {                    string servicepath = AppDomain.CurrentDomain.BaseDirectory + @"AutoWorker.exe";                    ManagedInstallerClass.InstallHelper(new string[] { servicepath });                    MessageBox.Show(this.textBoxServiceName.Text + "服务已安载成功");                }            }            catch (Exception exception)            {                if (exception.InnerException != null)                {                    MessageBox.Show(exception.InnerException.Message);                }                else                {                    MessageBox.Show(exception.Message);                }            }        }        /// <summary>        /// 卸载服务        /// </summary>        /// <param name="sender"></param>        /// <param name="e"></param>        private void buttonUnInstall_Click(object sender, EventArgs e)        {            try            {                if (this.GetService(this.textBoxServiceName.Text) != null)                {                    string servicepath = AppDomain.CurrentDomain.BaseDirectory + @"AutoWorker.exe";                    ManagedInstallerClass.InstallHelper(new string[] { "/u", servicepath });                    MessageBox.Show(this.textBoxServiceName.Text +  "服务已卸载成功");                }            }            catch (Exception exception)            {                if (exception.InnerException != null)                {                    MessageBox.Show(exception.InnerException.Message);                }                else                {                    MessageBox.Show(exception.Message);                }            }        }        /// <summary>        /// 获得服务的对象        /// </summary>        /// <param name="servicename">服务名称</param>        /// <returns>ServiceController对象,若没有该服务,则返回null</returns>        public  ServiceController GetService(string servicename)        {            try            {                ServiceController[] serviceController = ServiceController.GetServices();                foreach (ServiceController serviceItem in serviceController)                {                    if (serviceItem.ServiceName.Equals(servicename, StringComparison.OrdinalIgnoreCase))                    {                        return serviceItem;                    }                }                return null;            }            catch (Exception exception)            {                throw new Exception(exception.Message);            }        }    }}
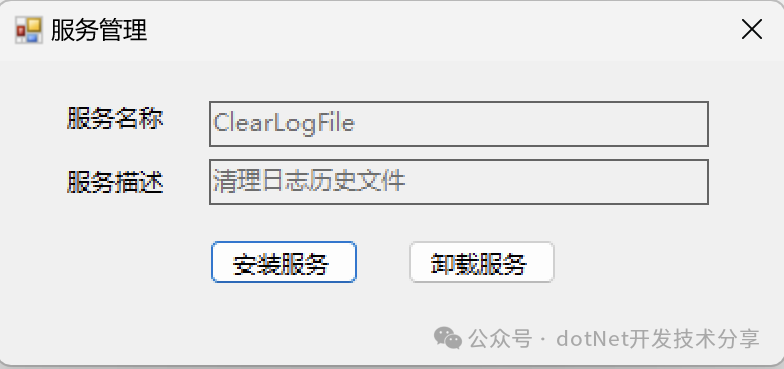
示例完整代码:
小结
以上是C#使用ServiceBase类创建与部署服务应用程序的全部内容,是.NET Framework 提供的一种实现方式。而NET Core 3.0 及以上和.NET 6.0还提供了另一种实现方式,后续介绍。希望本文对有需要的朋友能提供一些参考。如有不到之处,请多多包涵。
该文章在 2024/6/8 18:06:30 编辑过